Maisara Caverns
Maisara Caverns is a three-boss Zul'aman dungeon and one of the most punishing instances in the Midnight Season 1 pool. Nothing about it is unfair, but everything demands coordination: tight interrupt rotations, disciplined positioning, and pre-pull cooldowns on dense jungle and undead trash. A prisoner-freeing gate before the first boss, a synchronized two-target burndown, a shield-and-rot necromancer, and a bridge-gauntlet finale make this a healer- and kick-intensive key.
🗺️ Overview
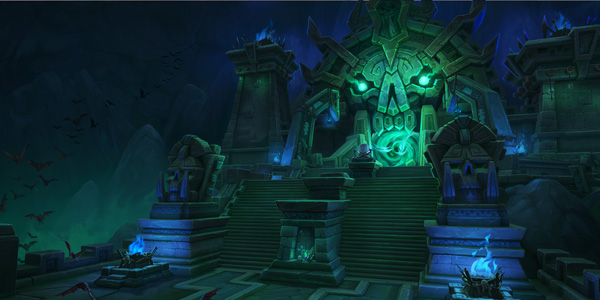
Maisara Caverns sits underground in the northeast of Zul'aman (entrance near /way 44.4 40.3). It is a compact, mostly linear instance with two side rooms before each of the three boss arenas, but its difficulty reputation is well-earned — the trash punishes lazy cooldown usage harder than some of the bosses.
- Bosses (in order) - Muro'jin & Nekraxx (a synchronized duo), Vordaza (a shield-and-rot necromancer), and Rak'tul, Vessel of Souls (a knockback + bridge-gauntlet finale).
- Prisoner gate - before the first boss you must free 8 of 12 Witherbark Prisoners scattered across the entry caverns; this can only be done out of combat and gates progression.
- Theme - the first third is living Vilebranch troll jungle (beasts, headhunters, hexxers); the back two thirds shift to Rak'tul's undead soul-harvest (shades, soulrenders, reanimated warriors).
- Why it is hard - heavy interrupt density, multiple CC-immune elites that must be answered with defensives instead of kicks, and constant rot/absorb healing pressure.
🧭 Optimal Route & Pull Strategy
Maisara is a near-linear path with two side rooms before each boss. You can shave trash by pathing tightly, but do not get greedy — packs here are CC-heavy and several mobs are CC-immune. A PUG-friendly MDT route exists on Wago. General flow:
- Entry caverns — spread out and free 8 of the 12 Witherbark Prisoners while OUT of combat; this gate must be cleared before Muro'jin & Nekraxx can be pulled. Path toward the RIGHT to pick up the stronger Hearty Vilebranch Stew buff.
- Clear the jungle trash gating the first arena: Bramblemaw Bears, Keen Headhunters, Hexbound Eagles, Ritual Hexxers. Pull in small groups so the tank does not eat stacking Crunch Armor from too many Bears at once.
- Boss 1: Muro'jin & Nekraxx — stack both together and balance damage so they die within a few seconds of each other.
- Mid-section toward Vordaza: this is the Hex Guardian / Searing-Presence stretch. Do NOT face-pull Hex Guardians into a hallway chokepoint — they pulse constant AoE and are CC-immune. Pull them in the open with cooldowns ready. Optional altars here can spawn a friendly Vengeful Shade (low value).
- Boss 2: Vordaza — clear the side rooms, then pull. Save burst for the Necrotic Convergence shield.
- Cross the bridge to Rak'tul: it is filled with mobs you have already seen (Tormented Shades, Reanimated Warriors, Grim Skirmishers, Bound Defenders, Hollow Soulrenders). A single mini-boss, Zil'jan, sits at the far end channeling Ritual Drums and launching bouncing shadow orbs down the bridge — kill him to stop the orbs.
- Boss 3: Rak'tul, Vessel of Souls — the finale, with the Soulrending Roar bridge intermission.
💀 Boss Guide
Three encounters, each with a distinct theme. Ability names below are taken from Icy Veins and Method; where a source disagreed (the first-boss revive cast) both names are noted.
🪓 Trash, Interrupts & Crowd Control
Trash is the real difficulty of this key. Several elites are CC-immune — you cannot stun or kick your way out, so answer them with defensives, healing cooldowns, and positioning. Priority kicks first:
- Ritual Hexxer - INTERRUPT every Hex (or Magic-dispel it); spare kicks go to its Shadow Bolt.
- Tormented Shade - interrupt Spirit Rend on as many casts as possible.
- Reanimated Warrior - it casts Reanimation the instant it hits 0 HP; stop the revive with ANY crowd control, then it dies for good.
- Keen Headhunter - interrupt Hooked Snare; pop a defensive if multiple Throw Spear target you.
- Hollow Soulrender - interrupt Shadowfrost Blast; avoid nearby Lost Souls during its Rend Souls channel (it detonates them). Do not cleave allies if hit by its Frost Nova.
- Gloomwing Bat - interrupt Piercing Screech (a line aimed at the tank).
- Umbral Shadowbinder - interrupt or CC its Shrink channel on a random player.
CC-immune elites — use defensives, not kicks:
- Hex Guardian - pulses constant AoE via Searing Presence; bring offensive, defensive AND healing cooldowns. NEVER face-pull these into a hallway chokepoint or you cook the healer.
- Dread Souleater - Necrotic Wave arcs to all nearby players and applies a healing absorb; stagger defensives/healing CDs to burn through it. Avoid the Rain of Toads ground puddles.
- Hulking Juggernaut - Deafening Roar hits hard AND spell-locks anyone mid-cast; pre-defensive and STOP casting before it completes.
- Restless Gnarldin - out-range Ancestral Crush; its Spectral Strikes passive adds AoE shadow damage to every melee swing (healer awareness).
- Bound Defender - Vigilant Defense is a frontal spell-immunity shield that reflects attacks; tank points it AWAY from the group and DPS attack it from behind. Dodge its Soulstorms.
- Bramblemaw Bear - stacks Crunch Armor on the tank; limit how many you pull at once.
- Grim Skirmisher - has a Grim Ward shield that deals group-wide damage when broken; break them at DIFFERENT times (or purge a few early) so they do not all explode together.
- Hexbound Eagle - sidestep Shredding Talons.
- Rokh'zal - Ritual Sacrifice traps an ally; break the channel/shield, or use a movement immunity like Blessing of Freedom / Tiger's Lust to cancel it.
✴️ Seasonal Affix Interactions
Midnight Season 1 layers Lindormi's Guidance (low keys), one rotating Xal'atath's Bargain at +5 to +11, Fortified/Tyrannical from +7 (both at +10), and Xal'atath's Guile at +12. How they play in Maisara:
- Fortified - brutal here. The CC-immune pulsing elites (Hex Guardian, Dread Souleater, Restless Gnarldin) and the bridge gauntlet all get nastier; this is the harder rotation week for Maisara. Pull smaller and pre-cooldown every dangerous pack.
- Tyrannical - the synchronized Muro'jin & Nekraxx burndown and Vordaza's Necrotic Convergence shield both get longer/tankier — line up bloodlust and burst windows on those, and the tank needs every Drain Soul / Spiritbreaker / Flanking Spear defensive.
- Ascendant (Bargain) - spawns orbs you CANNOT kill (huge absorb); answer them with dispels, interrupts, or displacement (knockbacks, Ring of Peace, grips). The bridge and Hex Guardian halls are tight spaces to manage them in.
- Voidbound (Bargain) - kill the Voidbound Emissary fast while interrupting its Dark Prayer — coordinate with your already-heavy kick rotation on Hexxers/Shades so you do not run out of interrupts.
- Pulsar (Bargain) - stack the group to clear Pulsars together; easiest to handle in the open arenas, awkward in the Hex Guardian chokepoints.
- Devour (Bargain) - not purely a healer problem; everyone uses personal dispels/racials. Stacks with this dungeon's already-high rot pressure (Vordaza, Necrotic Wave, Withering Soul).
- Lindormi's Guidance - low-key training wheels: marked Temporal Sands mobs give full Enemy Forces credit and deaths do not drain the timer. Use it to learn the prisoner gate and bridge.
- Xal'atath's Guile (+12) - every death subtracts 15s; the explosion-heavy bridge and the cook-your-healer Hex Guardian packs are the most common death sources, so play those conservatively.
🎁 Notable Loot
| Boss | Item | Slot / Type |
|---|---|---|
| Muro'jin & Nekraxx | Traitor's Talon | Polearm |
| Muro'jin & Nekraxx | Deceiver's Rotbow | Bow |
| Muro'jin & Nekraxx | Reanimator's Weight | Mail Shoulder |
| Muro'jin & Nekraxx | Trollhunter's Bands | Plate Wrist |
| Muro'jin & Nekraxx | Falconer's Cinch | Leather Waist |
| Muro'jin & Nekraxx | Nightprey Stalkers | Cloth Boots |
| Vordaza | Ceremonial Hexblade | Dagger |
| Vordaza | Soulcatcher's Charm | Trinket (Intellect) |
| Vordaza | Enthralled Bonespines | Leather Shoulder |
| Vordaza | Soulhunter's Mask | Back |
| Vordaza | Vilehex Bonds | Cloth Hands |
| Vordaza | Wickedweave Trousers | Mail Legs |
| Vordaza | Footwraps of Ill-Fate | Plate Boots |
| Rak'tul, Vessel of Souls | Vessel of Tortured Souls | Trinket (Mastery) |
| Rak'tul, Vessel of Souls | Liferipper's Cutlass | 2H Sword |
| Rak'tul, Vessel of Souls | Berserker's Hexclaws | Fist Weapon |
| Rak'tul, Vessel of Souls | Soulblight Cleaver | 1H Axe |
| Rak'tul, Vessel of Souls | Fetid Vilecrown | Leather Head |
| Rak'tul, Vessel of Souls | Amalgamation's Harness | Plate Shoulder |
| Rak'tul, Vessel of Souls | Decaying Cuirass | Mail Chest |
🧠 Role Tips & Common Wipe Causes
- TANK — Use a major defensive on EVERY Flanking Spear (Boss 1), Drain Soul (Boss 2) and Spiritbreaker (Boss 3); these are scripted tank hits, not optional. On Spiritbreaker move out before the leap lands so the Spectral Decay puddle drops away from the group.
- TANK — Point Bound Defenders AWAY from the party (Vigilant Defense reflects), and limit how many Bramblemaw Bears you grab at once due to stacking Crunch Armor. Never drag Hex Guardians into a chokepoint.
- HEALER — This is a rot/absorb-heavy key. Stagger your cooldowns: Infected Pinions (B1), Wrest Phantoms collisions + Necrotic Convergence (B2), Deathgorged Vessel + the Soulrending Roar bridge (B3). Dread Souleater's Necrotic Wave applies a healing absorb — be ready to overpower it.
- DPS — Interrupt discipline wins this dungeon: assign kicks for Ritual Hexxer (Hex), Tormented Shade (Spirit Rend), Hollow Soulrender (Shadowfrost Blast), Umbral Shadowbinder (Shrink) and Gloomwing Bat (Piercing Screech). Use CC to stop Reanimated Warrior's Reanimation at 0 HP.
- DPS — On Boss 1, BALANCE damage so Muro'jin and Nekraxx die together; killing one early triggers a revive or a stacking enrage. On Vordaza, hold burst for the Necrotic Convergence shield. Attack Bound Defenders from behind.
- ALL — Free 8 of 12 Witherbark Prisoners out of combat before Boss 1, or you cannot progress.
- COMMON WIPES — Face-pulling CC-immune Hex Guardians into a hallway (healer cooks); breaking multiple Grim Skirmisher Grim Wards at once (group-wide burst); letting one Boss-1 target die too early; walking into Lost Souls on the bridge; and ignoring the ramping Necrotic Convergence shield until raid-wide shadow damage overwhelms the healer.